

Content of the VM
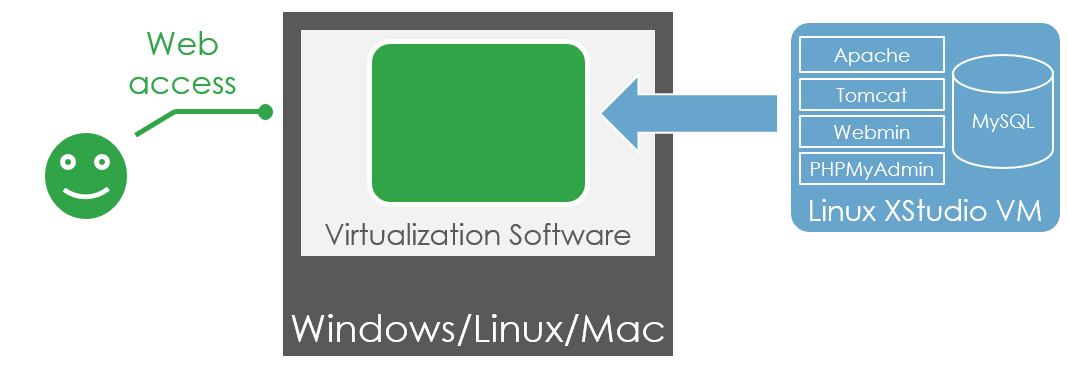
It comes with everything pre-installed and configured!We pre-configured and optimized a server for you that includes ALL the components that you will need on your XStudio Server instance.
This server is based on a Linux LAMP server that can run with only 512 Mbytes of RAM.
This is an optimized headless server that can boot in 20 seconds and provide great performances.
You don't really need to be fully aware of all the components/packages included in the VM but the list is provided below for your information:
| Components | |
|---|---|
| Linux Distribution | Debian 7.2 Wheezy |
| Kernel | Linux 3.2.0-4-686-pae |
| Database server | MySQL 5 |
| Web server | Apache 2 |
| Web app server | Tomcat 7 |
| Automatic backup tool | Automysqlbackup |
| Web administration tool | WebMin |
| Database administration tool | PhpMyAdmin |
Prerequisites
To install and run this VM, you'll need a virtualization software such as VirtualBox (free) or VMWare.These virtualization softwares can be installed on any OS (Windows win32/win64, MacOSX, Linux or Solaris).
Import the VM
Once you have VirtualBox or VMware installed on your server, it's very easy to import and run our pre-installed and configured XStudio VM.For the rest of the process, please click on the appropriate option below:

- Download the pre-configured XStudio v#application_fullversion_vm# server VM for VirtualBox ova file (Warning: ~3GBytes)
- Import the .ova file to VirtualBox (from the menu)
- Edit the Network Settings
Enable the network adapter, select the Bridged Adapter option and pick your usual local network interface (always prefer LAN to Wifi as it will be more reliable)

- Start the VM
Click the Start button
On some version of VirtualBox you'll need to use the Start > Headless Start option
The VM will then start booting in a dedicated Windows.
After the VM has booted completely a welcome screen displays the IP address of the VM.
This is the IP address you will need to use to connect to XStudio.
- Configure the VM
This needs to be done at the first boot only:
Quit the control panel by selecting Advanced Menu, Quit and Select (using key strokes, not mouse!), log in asroot/rootpwdand execute the script./setup.sh.
This script automatically updates all the configuration files in the VM with the IP address the server has been assigned by DHCP (or the IP address you set statically using the Networking option).
(by the way, if you're using DHCP, ensure this server gets always the same IP address through a permanent leasing - don't forget this is a server you're setting up!).
If you need to change the keyboard settings, you can run the following commands:
dpkg-reconfigure console-dataYou may need to restart the VM to have the change applied.
dpkg-reconfigure keyboard-configuration
service keyboard-setup restart
If at one point, you need to change the IP address (or name) of your server, don't forget to manually update it in these 5 following configuration files:/var/lib/tomcat8/webapps/xqual/xstudio/xstudio.conf,/var/lib/tomcat8/webapps/xqual/xstudio/xstudio.jnlp,/var/lib/tomcat8/webapps/xqual/xstudio/xagent.jnlp,/var/lib/tomcat8/webapps/xqual/xstudio/xstudio.jsp,/var/lib/tomcat8/webapps/xqual/xstudio.conf.
- Download the pre-configured XStudio v#application_fullversion_vm# server VM for VMWare zip file (Warning: ~3GBytes)
- Unzip it and upload it to one of the datastores of your vSphere Hypervisor server.
The easier way to do so is to first unzip the package in a new local temporary folder:
Then use the datastore browser of the vSphere Client to upload the whole folder to the remote datastore on the server.
To do so, go to the Configuration tab on vSphere Client, select a datastore and right click to open the datastore browser. Then upload the whole temporary folder that contains the 2 .vmdk files.
- Create a new VM in VMWare based on the provided disk
From the vSphere client's menu select New > Virtual Machine
In this wizard, you can leave all the default values.
Just ensure to pick the Linux/Debian GNU/Linux 6 (32 bit) distribution and make sure to allocate at least 1Gbyte of memory.
When it's about selecting the disk, select Use an existing virtual disk and select the folder you previously uploaded:
- Start the VM
Once the VM is imported, select it and click the Start button
The VM will then start booting and you can see it in the Console tab of the vSphere Client.
After the VM has booted completely a welcome screen displays the IP address of the VM.
This is the IP address you will need to use to connect to XStudio.
- Configure the VM
This needs to be done at the first boot only:
Quit the control panel by selecting Advanced Menu, Quit and Select (using key strokes, not mouse!), log in asroot/rootpwdand execute the script./setup.sh.
This script automatically updates all the configuration files in the VM with the IP address the server has been assigned by DHCP (or the IP address you set statically using the Networking option).
(by the way, if you're using DHCP, ensure this server gets always the same IP address through a permanent leasing - don't forget this is a server you're setting up!).
If you need to change the keyboard settings, you can run the following commands:
dpkg-reconfigure console-dataYou may need to restart the VM to have the change applied.
dpkg-reconfigure keyboard-configuration
service keyboard-setup restart
If at one point, you need to change the IP@ (or name) of your server, don't forget to manually update it in these 5 following configuration files:/var/lib/tomcat8/webapps/xqual/xstudio/xstudio.conf,/var/lib/tomcat8/webapps/xqual/xstudio/xstudio.jnlp,/var/lib/tomcat8/webapps/xqual/xstudio/xagent.jnlp,/var/lib/tomcat8/webapps/xqual/xstudio/xstudio.jsp,/var/lib/tomcat8/webapps/xqual/xstudio.conf.
Check the install
Now that the install is completed, let's check your server is fully operational.Start XStudio from any computer
- Open the URL:
http://<IP address>:8080/xqual/xstudioand click on the XStudio button
- Authenticate to XStudio using the default credentials:
Username: admin Password: password
- A couple of warnings will popup to indicate that you're missing a license and that 2 major features that are enabled in the configuration have been automatically disabled:
- The test case procedure Grid Editor
- The ability to use rich-texts in the test case procedures


It also summarizes the limitations of the community version:
- XStudio's GUI appears on the screen.
Start XStudio.web from any computer
This must be done AFTER you've executed XStudio first at least once.- Open the URL:
http://<IP address>:8080/xqual/xstudio.web/and login
- Authenticate to XStudio using the default credentials:
Username: admin Password: password
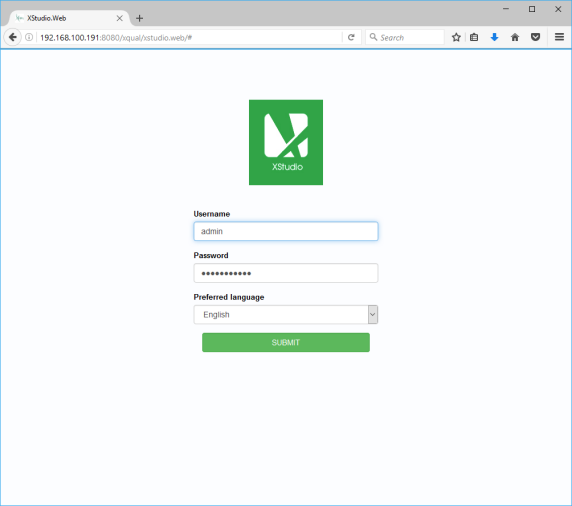
- XStudio's GUI appears on the screen.
Try the REST API
You can access programmatically the XStudio REST-API server using the following URL:http://<IP address>:8080/xqual/api?<query>For instance, you can browse the URL:
http://<IP address>:8080/xqual/api?command=getInfoThis should return a json string containing information about the server:
i.e.
{"application_title":"XStudio","application_copyright":"(c) copyright XQual",
"application_version":"3.0sp7", "database_schema_version":"78"}
For more information on the types of queries you can post please refer to the REST API documentation.
Check the automatic database backup
In this VM, the XStudio database is backuped daily overnight (with weekly and monthly rotations).| Account used for local backup | xstudio/xstudiopwd |
All the backups can be found in
/var/lib/automysqlbackup in the daily, weekly, monthly and latest folders.In addition, the latest backup is copied and transfered once a week (on Sunday) to the FTP server of your choice.
To specify the IP address of the FTP server and the credentials to use, just edit the file
/root/scripts/transfer_weekly_backup.sh
and modify the variables HOST, USER and PASSWD.On the FTP server you'll need to create a destination folder named with the IP address (or name) of your server. This way, you can have several XStudio instances backuped on the same remote FTP server.
Request a license
At this stage, you have XStudio Community Edition installed (with all its limitations).DON'T FORGET to get your FREE trial license!
After you install your license key, all the limitations will be removed and all the additional features will be enabled automatically.
Managing the VM
SSH/SFTP
The VM can be accessed through SSH or SFTPThis means you can use very powerfull graphical tools such as WinSCP to drive your VM remotely.
You can also use putty or any other SSH/SFTP client if you wish.
| SSH/SFTP (port 22) | root/rootpwd |
Remote SQL connection
You can connect remotely to the the VM's database using standard MySql clients (i.e. SQLYog Community edition that we recommend) using the following credentials:| Account used for remote connection (port 3306) | xstudio/xstudiopwd |
Samba Network File System
The VM also has a Samba service running (the server can be seen on the network) with an anonymous share.File Manager
The VM has a web File Manager. It's a convenient way to manage the files on the server remotely from your browser, upload files, download files etc.You may need to add
https://<IP address>:12321 in the whitelist of you Java to be able to use it though (as it's not signed).Webmin
A web-based control-panel is also available to manage the File-system, the MySQL server, the databases, the web services etc.| Homepage of all tools | https://<IP address> | root/rootpwd |
| - Webmin | https://<IP address>:12321 | root/rootpwd |
| - PHPMyAdmin | https://<IP address>:12322 | root/rootpzd |
| - Webshell | https://<IP address>:12320 | root/rootpwd |
| Tomcat App. Manager | http://<IP address>:8080/manager/html | tomcat/tomcatpwd |